Published by: Bill Chesnut
The process for creating a BizTalk 2016 Developer machine with 2016 has changed from the previous versions, the Azure Gallery Image does not have SQL, Visual Studio or BizTalk installed, so I will walk you through those steps here.
Start with either the Classic or ARM Azure Gallery Image (ARM Image show below)

Logon to your newly created machine

You might want to turn off the IE Enhanced Security Configuration or you will be prompted for every website you visit

The image does not contain Visual Studio or SQL so you will need to download those:
You might need to signup for a free Visual Studio Dev Essentials subscription on http://my.visualstudio.com
SQL 2016 Developer:

Visual Studio 2015 (Community is free, use Professional or Enterprise if you have an MSDN subscription)

SQL Server Management Tools – http://go.microsoft.com/fwlink/?LinkID=822301
You should now have these files in your download directory

Installing SQL 2016 Developer Edition
We are now going to install SQL 2016 Developer Edition on the image
Note: for this installation I will be using the Administrator (bizadmin) for all services, you can use the accounts dictated by your companies security policies
Installing SQL Management Tools
We are now going to install SQL 2016 Management Tools on the image
| Double Click on the setup application |
 |
| Click Install |
 |
| Installation Complete, Click Close |
 |
Installing Visual Studio 2015 Community Edition
We are now going to install Visual Studio 2015 Community Edition on the image
Note: if you have MSDN subscription, feel free to install professional or enterprise
| Double Click on the installer application |
 |
| For BizTalk the default is all that is required, feel free to do a custom install
Click Install
Note: this install may take some time, it is using the web installer and will need to download all the required files
|
 |
| Installation Complete
Click Launch
|
 |
| Click Sign In |
 |
| Click Tools, Click Extensions and Updates |
 |
| Install all of the updates
Visual Studio is now ready to go
|
 |
Installing BizTalk Server 2016 Developer Edition
We are now going to install BizTalk Server 2016 Developer Edition on the image
Configuring BizTalk Server 2016 Developer Edition
We are now going to configure BizTalk Server 2016 Developer Edition on the image
| Enter the “User name” and “Password” that you want to use for the BizTalk Server Services, I am using the administrators account but feel free to create and use another account
Click Configure
Note: Ignore the warning about administrator account, this is a developer machine not production
|
 |
| Click Next |
 |
| Configuration Complete
Click Finish
|
 |
Installing LOB Adapters
We are now going to Install the LOB Adapters & SDK on the image
| Double Click on Setup |
 |
| Click “Install Microsoft BizTalk Adapters” |
 |
| Click Step 1… to install SDK
Follow Setup Wizard
Note: I typically do a Complete install in everything in the Adapter Pack on a developer machine
|
 |
| Click Step 2… to install Adapter Pack
Follow Setup Wizard
Note: I typically do a Complete install in everything in the Adapter Pack on a developer machine
|
 |
| Click Step 3… to install Adapter Pack (x64)
Follow Setup Wizard
Note: I typically do a Complete install in everything in the Adapter Pack on a developer machine
|
 |
(Optional)
Click Step 4… to install Adapter for Enterprise Applications
Follow Setup Wizard
Note: I typically do a Complete install in everything in the Adapter Pack on a developer machine
|
 |
| Open the BizTalk Server Administration Console
Expand Tree, Right Click Adapters, Click New, Click Adapter
|
 |
| Type Name WCF-SQL, Select WCF-SQL from Adapter drop down list
Click OK
Note: this is the only adapter I typically add, but feel free to add the rest of the adapters if you development project is going to need them.
|
 |
Installing & Configuring ESB Toolkit (Optional)
We are now going to Install and Configure ESB Toolkit on the image
| Double Click Setup |
 |
| Click “Install Microsoft BizTalk ESB Toolkit” |
 |
| Accept License agreement
Click Next
|
 |
| Click Next
Note: JMA is optional, I typically don’t install it.
|
 |
| Click Install |
 |
| Installation Complete
Click Finish
|
 |
| Click ESB Configuration Tool from the Menu |
 |
| Enter Highlighted Fields
Click ESB BizTalk Applications
|
 |
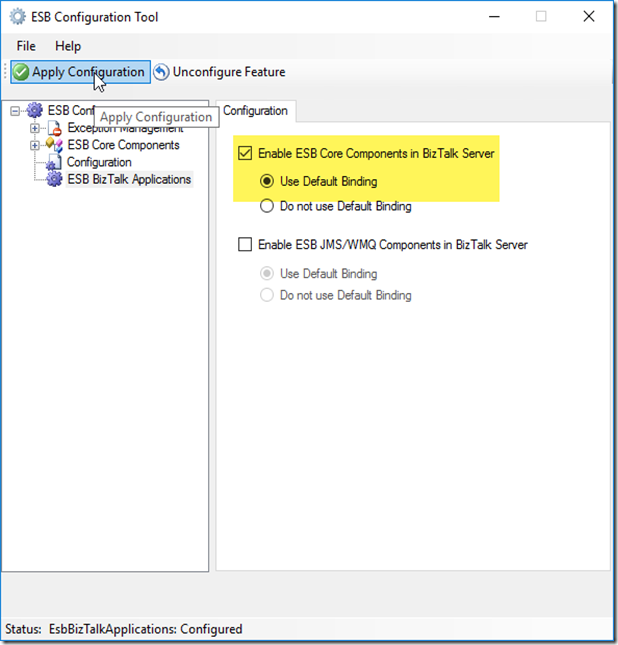
| Configure ESB BizTalk Applications as shown
Click “”
|
 |
| Once Configuration Completes, Close Configuration tool |
 |
Final Configuration for Developer Image
We are now going to do the final configuration on the image
| Open Microsoft SQL Server Management Studio from the Menu |
 |
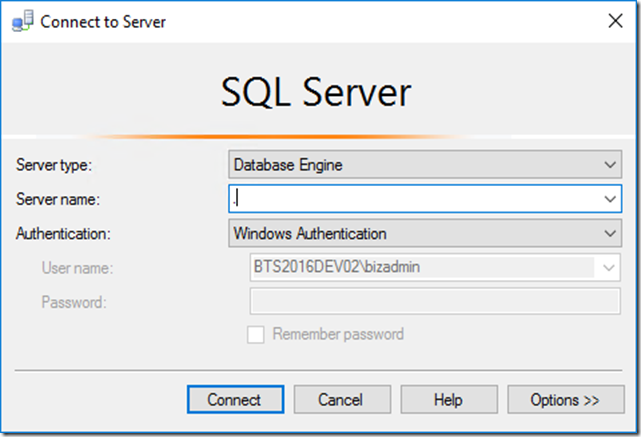
| Connect to your database server
Click Connect
Note: full stop or period means local machine
|
 |
| Click “New Query” |
 |
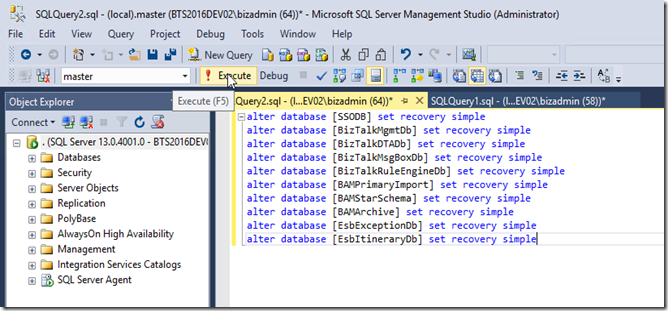
| For a developer image of BizTalk is it not necessary to create transaction logs for the BizTalk Databases, so the command below will set all database into simple recovery mode so no transaction logs are created and not database backups are required
Execute the Query
select ‘alter database [‘+name+’] set recovery simple’ from master.sys.databases where database_id > 4 and state_desc = ‘online’
|
 |
| Copy the output of the previous command into a new query window |
 |
| Click Execute
Note: all the databases are in simple recovery mode so there is no need to configure the BizTalk Backup Job
|
 |
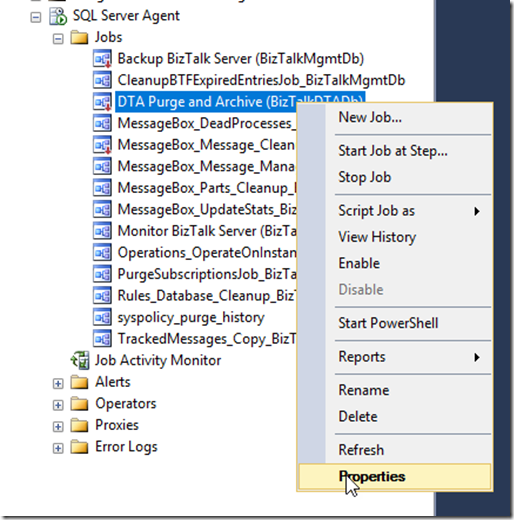
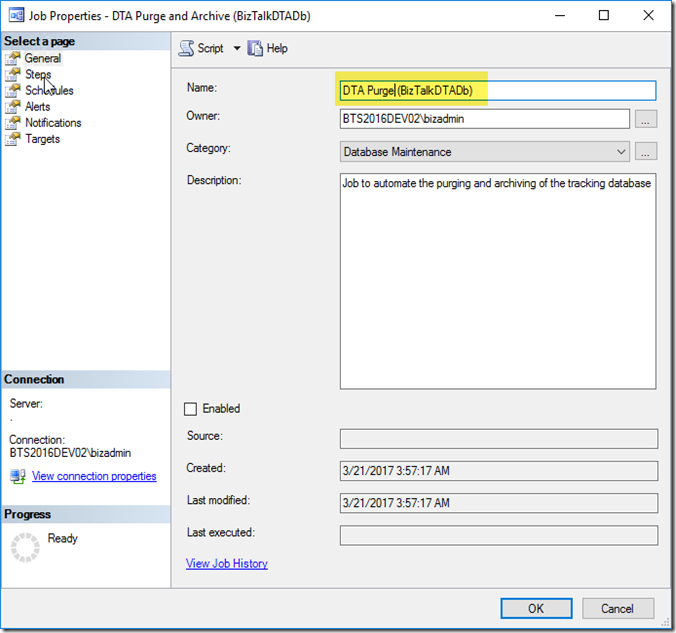
| To keep the tracking database for becoming large on the developer image, we need to setup the DTA Purge Job
Right click on the “DTA Purge and Archive (BizTalkDTADb)”
Click Properties
|
 |
| Change the name to “DTA Purge (BizTalkDTADb)”
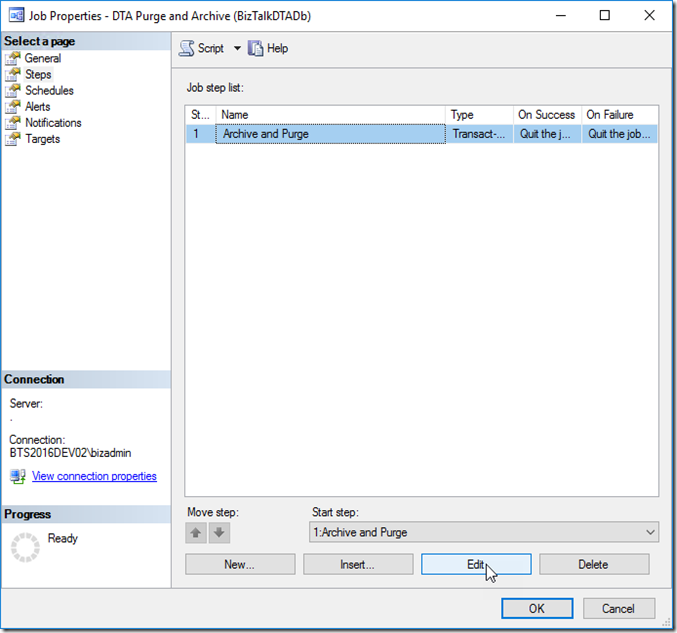
Click Steps
|
 |
| Edit the Step |
 |
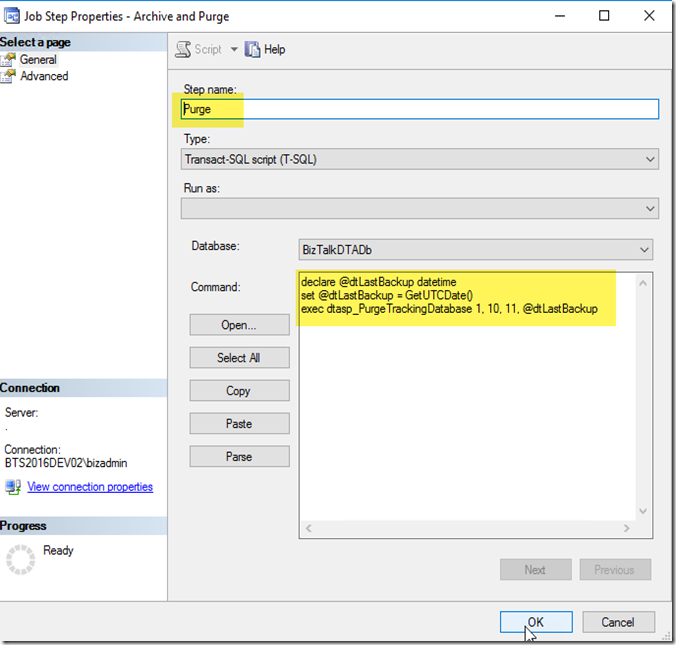
| Change the step name to “Purge”
Update the Command to the text below
Click Ok, Click Ok
declare @dtLastBackup datetime
set @dtLastBackup = GetUTCDate()
exec dtasp_PurgeTrackingDatabase 1, 10, 11, @dtLastBackup
|
 |
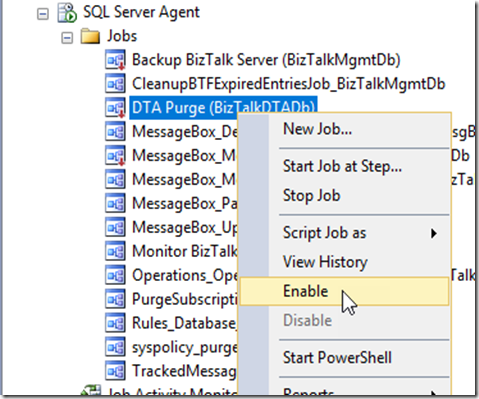
| Right click on the “DTA Purge (BizTalkDTADb)”
Click Enable
Note: you can then do the same and select “Start Job at Step” to make sure you don’t have any syntax errors.
|
 |
Conclusion
This finished the basic configuration with a few extra, if you are using BizUnit, BTDF, SpecFlow or any other tools, you will need to install them now.
I would also recommend running windows update to get the latest updates installed
I hope this instruction and screen shots help you get your BizTalk Server 2016 Developer Azure Gallery Image up and running smoothly


3 thoughts on “Creating BizTalk Server 2016 Developer from Azure Gallery Image”
Comments are closed.